Supported snom models: snom M Series
This guide is applicable to the following devices:
- snom M300
- snom M700
Configuring the provisioning server via the snom web interface:
Step 1: Configure the base in 3CX
- Obtain the phone’s MAC address.
- In 3CX Management Console navigate to ⇒ “FXS/DECT”.
- Press “+ Add FXS/DECT”.
- Select the Brand of the phone (snom).
- From the dropdown list select select the model.
- Enter the device’s MAC address and press “OK”.

- Optional settings include the phone’s “Display Language”, “Time Zone”, “Tone Set” (which controls the DST settings of the handsets) and, if applicable, the network card interface in case the server has more than one IP address to which the phone shall be configured.
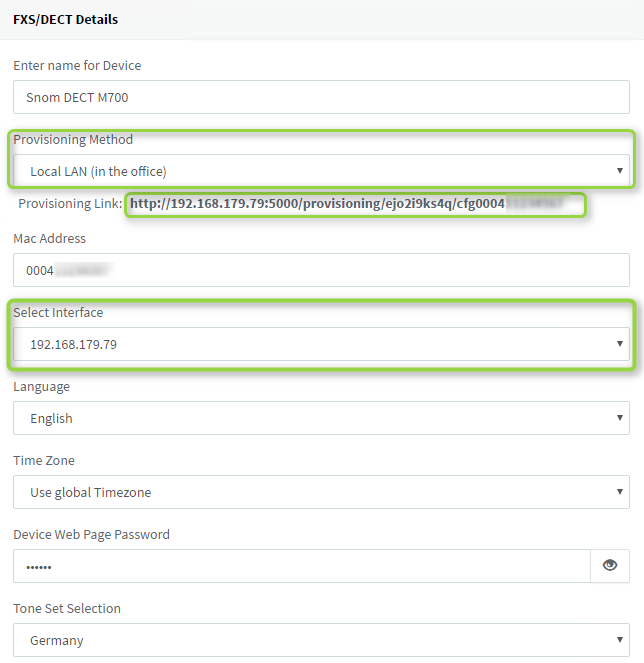
- Copy the “Provisioning Link” shown above for future use.
- Navigate to the “Extensions” tab of the desired “FXS/Dect” device to assign the extensions and click “OK”.
Note: If you have more extensions that you wish to add, you can do it by simply pressing “Add more line”.

Step 2: Enter the Information into device’s Web Interface

- Point your web browser to your device’s IP address.
- Navigate to “Management”.
- Enter your “Provisioning Link” URL into the “Configuration Server Address”.
- Press “Save and Reboot” to provision your snom DECT base station.